
BUILDING A MEAT PROCESSING TRAILER, By Believer Patriot

Last year we raised several cows and pigs between 4 families in an effort to take control of our own meat production. This turned out to be very rewarding–the resulting cured meats, aged beef and sausage ended up far surpassing store-bought quality. We didn’t know what we were missing.
But we had a problem early on. When slaughter and processing time approached, we learned that all the commercial processors in the area were booked several months solid. We would have to bend to their schedule or find another way. We elected to build our own processing trailer. Moving an animal by trailer is stressful and typically requires a day in a calming pan on the other end prior to slaughter. Bringing the processor to the animal would solve this problem. It would also allow us to carefully control the entire process and maintain robust sanitation.
Step one was to find a suitable enclosed trailer. A 16-footer with a rear drawbridge door and a forward personnel door would be perfect. New was out of the question—and out of our budget. For something that was going to see temporal use throughout the year and limited movement, it just wasn’t worth it. After two weeks, I stumbled onto this for $1600.

It wasn’t pretty but, it was perfect. After pulling it home, I promptly rebuilt the wheel bearings, put tires on it and checked the lights and brakes. It didn’t have to be pretty but it did have to be road worthy and safe.
Now for surgery. I started with the floor. I put down 2-inch pink foam board and covered it with tongue and groove sub-floor:

Then, I removed the existing wood covering the drawbridge door, hand fit 2-inch pink board and re-installed tongue and groove sub-floor onto it. The door was now about a half inch thicker so I glued filler strips on the vertical members and around the perimeter using construction cement then secured everything with self-drilling screws:

I wanted the last 6 feet of the trailer to serve as the cold box so I built a wall and installed a door. Note that the door and frame had to be shortened about an inch which required a new filler strip inside the bottom of the door. I just installed it with construction glue and taped it to dry:

Then, it was time to break out the Sawzall with a metal blade and cut the A/C unit hole:

After cutting the hole, I construction cemented 1 ½ inch wide filler strip all the way around the perimeter of the opening and clamped it using tape and a couple clamps. Then it was time to install the wiring:

Nothing fancy here. I just ran it all to a weather proof junction box on the front of the trailer that I fed with a 100-foot 12/3 extension cord wound onto a hose hanger that I mounted:

The next step was a critical one; I needed a structure that would hold hundreds of pounds of hanging quarters and halves while also absolutely preventing the A/C unit from ever, EVER separating from the trailer. That would be a very bad day that could get someone killed on the highway. The resulting structure looked like this:

The side members are full length glued (yup, construction cement) and screwed to the side walls and the bottom has a horizontal piece that is also glued and screwed to the floor. Note that the top supporting members are slightly arched to follow the ceiling line and place the members in compression when supporting a load. This is also why they are right next to trailer steel ceiling members. Each joint has ¼ inch gussets glued and brad nailed (a lot). I don’t show it but the A/C unit also has steel shelving brackets bolted to the outside through the 2X4s and to the A/C box underneath. I can’t stress enough that this structure needs to be absolutely rock solid. After everything had dried for a few days, I hung and jerked my 240 pounds all over this and the A/C box to make sure. Nothing budged.
Finally, it was time for insulation on the walls and ceiling. One of the other families worked a barter deal and got a local guy to spray it in and follow up with a coating of rhino liner:

We ended up with about 4 inches of insulation on the walls and ceiling. Excellent as this stuff is R7 per inch giving us an R28 wall and ceiling. The finished product was lumpy like the inside of a cave but we did not care at all. We could now spray the entire inside down with bleach, scrub it down and hose it out:

After, completion, it was time to slide the A/C unit in and add a CoolBot. This would allow me to run the room temp down to 34 degrees without icing up the A/C unit. I found a used stainless steel table and shelf at a local used restaurant supply store and installed them in the forward processing area. It all ended up looking like this:

Cold room. Note the temp gauge and alarm I added. The alarm lets me know if there’s a power loss or A/C failure. I installed eye hooks on the ceiling frame and ordered stainless steel meat hooks from a butcher supply.

Processing area all set up. Yes, that’s a TV on the shelf above. No reason not to be comfortable and entertained while makin’ bacon! But, there was another reason… We literally watched how-to videos the first time we processed pork and beef to make sure we were doing it right.

Making the best sausage we’ve ever had.
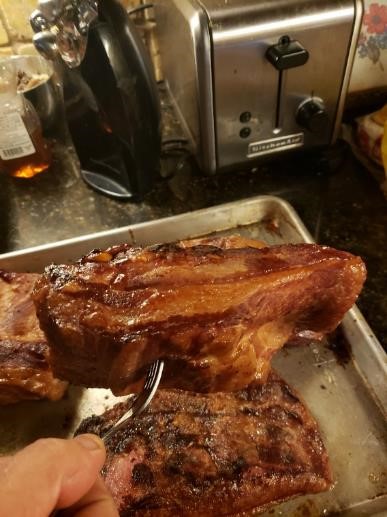
The store-bought bacon you buy may say “apple wood smoked” on it but it’s not. It’s been flavored with liquid smoke. Real applewood smoked bacon looks like this. We vacuum seal it in food saver bags in portions big enough that it will feed all of us at one breakfast. The hams came out perfect and we aged our beef for 4 weeks under perfect conditions. I can’t even tell you how good it all is!
So now we share. The trailer gets driven to where it’s needed next. The only thing we have to do is de-conflict the schedule. Total cost? $3300. That might sound like a lot but this year we will do 5 pigs and 4 cows. That’s a lot of processing cost saved.
Parting shot and lesson learned:

I should have known better having stepped around blood before. The stuff is like grease. When you’re moving a heavy animal half or quarter up an inclined ramp with meat hanging hooks in close proximity, the last thing you want to do is to slip and fall. So, the friction tape was added after the first processing event.
Take care all and,
STOUT HEARTS!
BP
Share This Story, Choose Your Platform!

About the Author: NC Scout
2 Comments
Comments are closed.


Howitzer Clothing – Code AP15 for 15% OFF


CIVIL DEFENSE MANUAL – Only $56.29 This Month!


GUNS N GEAR


[…] post BUILDING A MEAT PROCESSING TRAILER, By Believer Patriot appeared first on American […]
Beautiful project and well constructed. I love the overkill and inventive construction for an old trailer. In your processing room you may want to add .5″, holed, floor mats for comfort and the non slip factor. They can be removed and cleaned as needed. Also a small “point of use” hot water heater, as some warm water is nice during processing. Lastly, have an external water supply(tank/piping) that can be quickly hooked to your water heater, that is not part of your trailer as that would eat up too much room. There are many food equipment additions, an in a year, that puppy will have them all Im sure. Great project!
R